In this post, I will guide you on how to set the recording format on the Zoom H1n. This is the second post in this tutorial series on how to use your Zoom H1n to record your oral history interviews.
The first post in this series was a how to guide on how to format you microSD card using the Zoom H1n. The next post will be how to guide on setting your microphone sensitivity on the Zoom H1n. And the final post in this series will be on how to transfer your recorded audio files to your computer from the Zoom H1n.
But why is it important to set a recording format on the Zoom H1n.
The Zoom H1n can record audio in two formats: uncompressed wav and compressed mp3 format. Each of these recording format has four different options. For the wav format you have the 44.1 kHz, 48 kHz and 96 kHz sampling rate, and 16 or 24 bit depths. For the mp3, you have the choice of 48kbps to 360kbps bit rates.
Here is the hardy guide on the available recording settings on the Zoom H1n and how your choice of recording format affects recording quality and file size.
Here is the important part that you should know, when recording oral history interviews, 44.1 kHz/16-bit WAV is the minimum recording format for a preservation master and it is recommend that you record your oral history interviews using the 96 kHz/24-bit WAV format.
The audio files recorded using this format are meant for archival purposes and are very large in size – a 32GB microSD card can only hold 15 audio hours of this format. For sharing with your transcriber for transcription or presentation, it is recommended that you compress these files into smaller 192kbps mp3 files.
If you’d like me to pen a post on how to compress your oral history recording for sharing with your transcriber, let me know in the comments section below.
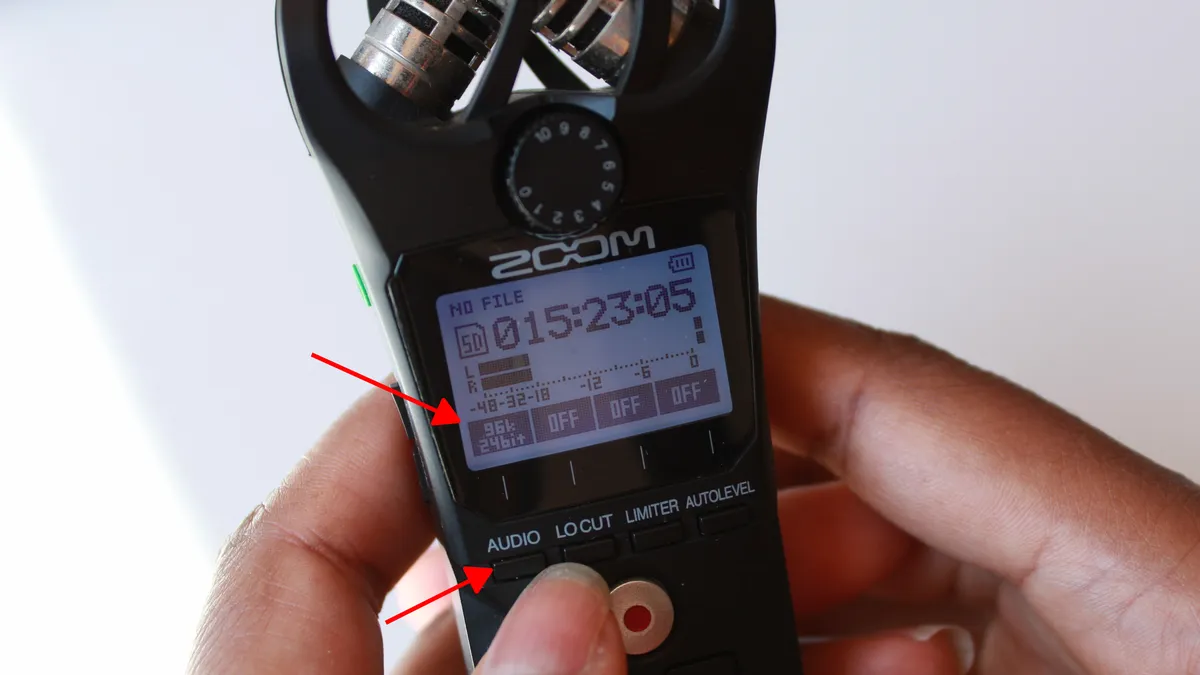
Let me show you how to set your Zoom H1n to record using the 96 kHz/24-bit WAV format suitable for archival purposes for oral history interviews.
Step 1
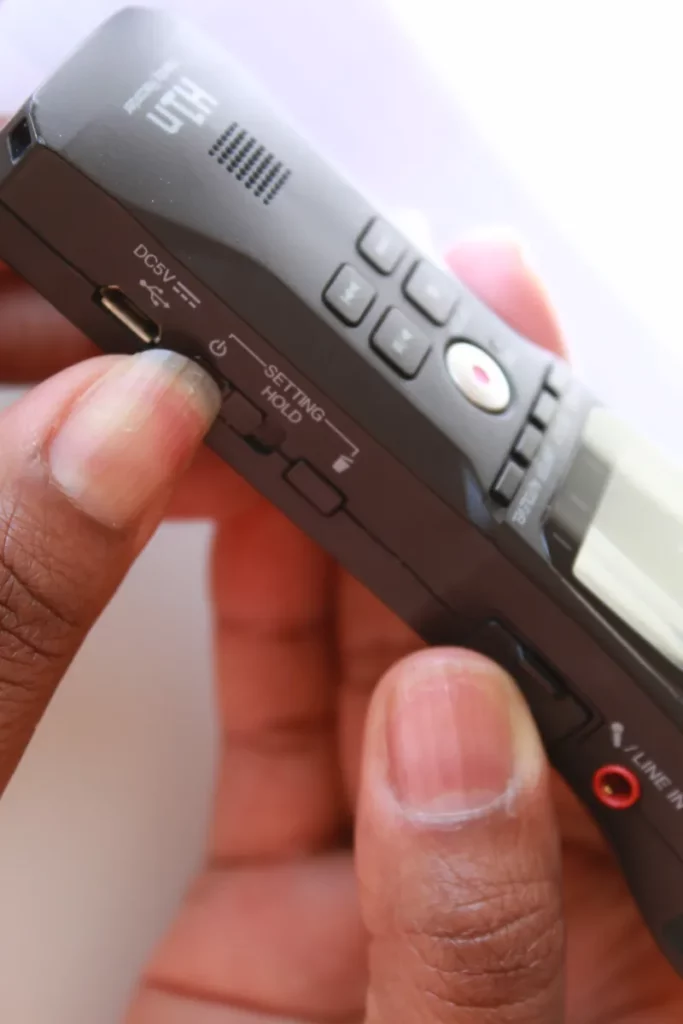
Turn on your Zoom H1n. If your Zoom H1n recorder is OFF, turn it on by sliding the power button to the left.
Step 2
Scroll through the Audio formats
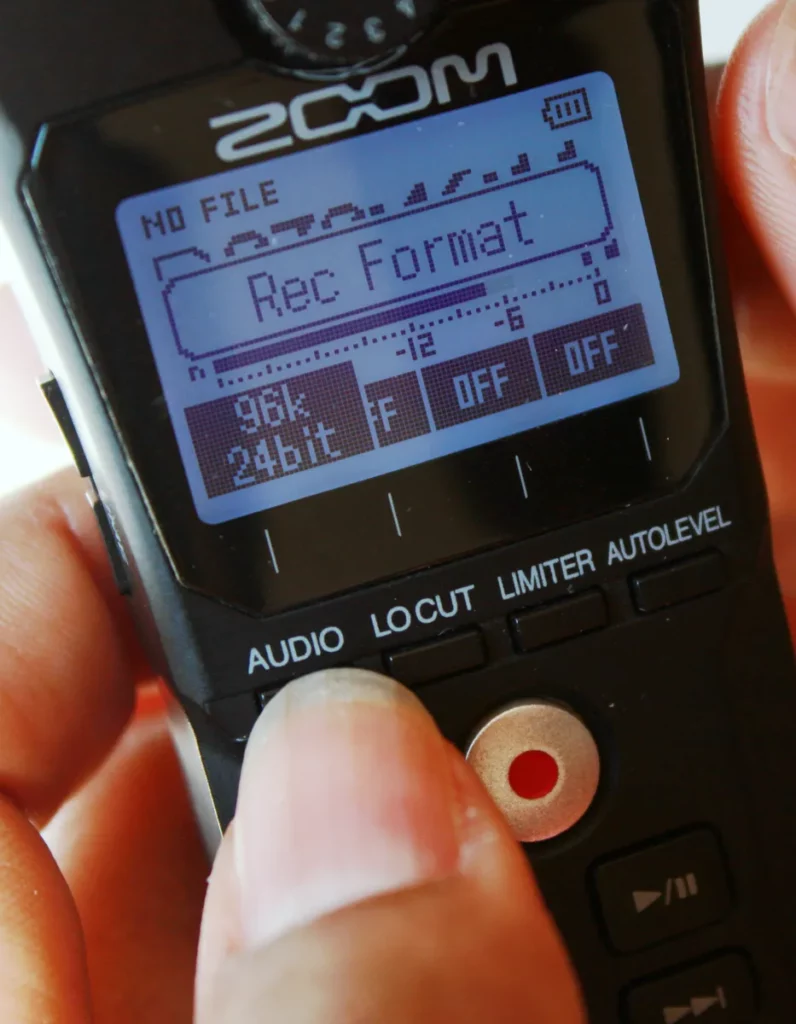
To cycle through the 8 audio format options on the Zoom H1n, tap the AUDIO button repeatedly. Scroll until you get to the 96k 24bit option. Then stop.
That’s it. The Zoom H1n will automatically set your selection as your preferred recording format. Your selection is also saved into a stable memory so that you don’t have to set it every time you switch off the recorder or change the batteries.
That’s it for this short, but important post. If you have any question or suggestions, let me know in the comments section below.
In the next post, I’ll show you how to set the sensitivity of your microphones on the Zoom H1n with a few recommendations on the best settings to use. Remember to always be kind, stay positive and learn to unwind.